Building an image and testing it in Minikube
With Podman Desktop, you can build an image with your container engine, and test it in your local Minikube-powered Kubernetes cluster.
Prerequisites
- You onboarded a container engine.
- You onboarded a Minikube cluster.
- You have set your Kubernetes context to your Minikube cluster.
- A container definition file:
ContainerfileorDockerfile.
Procedure
-
Build your image:
- Go to Images from the left navigation pane.
- Click Build.
- Provide the relevant details, such as Containerfile path, Image name, and Build arguments to build the image. For example, use the image name
my-custom-image. - Click Build. Wait for the image build to finish.
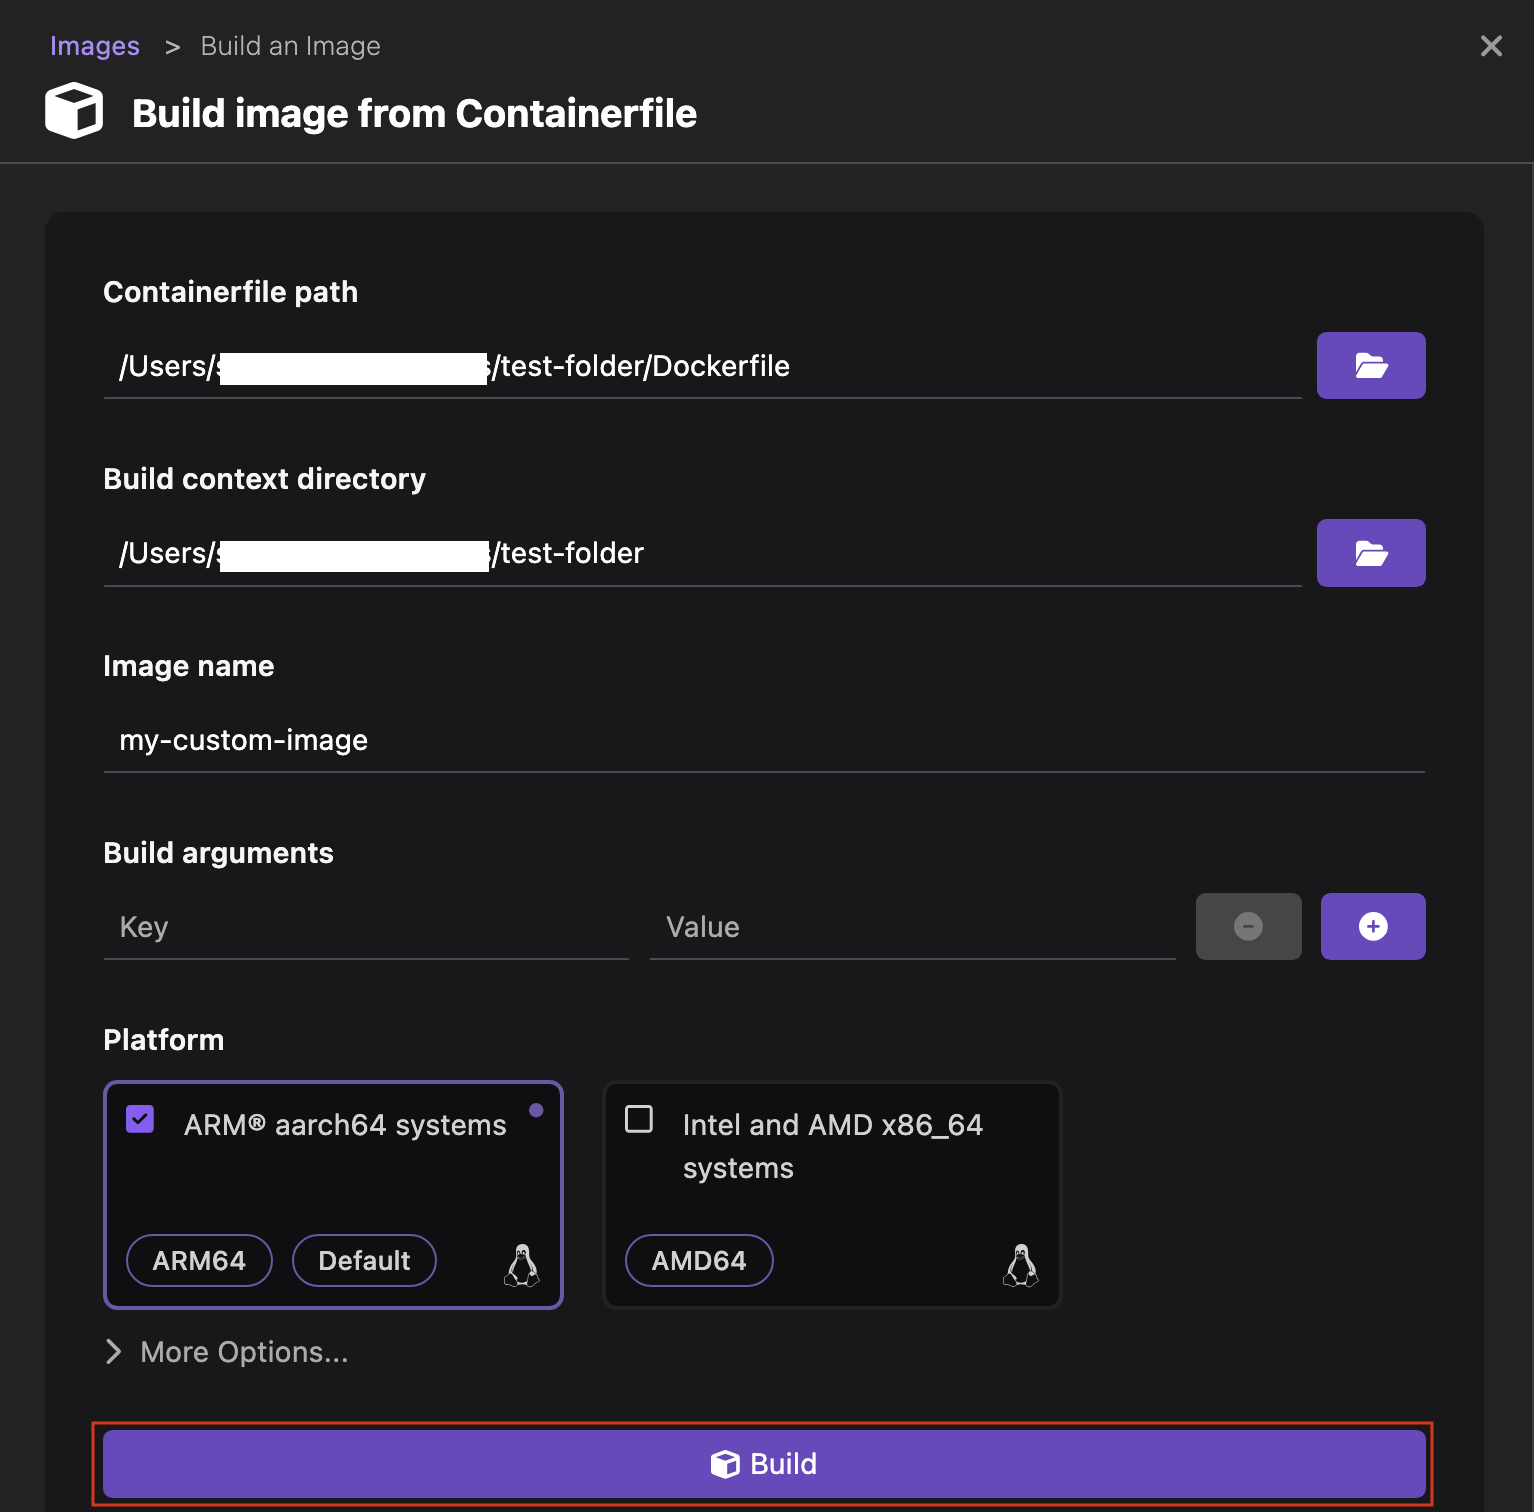
- Click Done to view the new image on the same page.
-
Push your image to your Minikube cluster:
- Click the overflow menu icon corresponding to
my-custom-imageand select Push image to minikube cluster. A successful operation notification opens.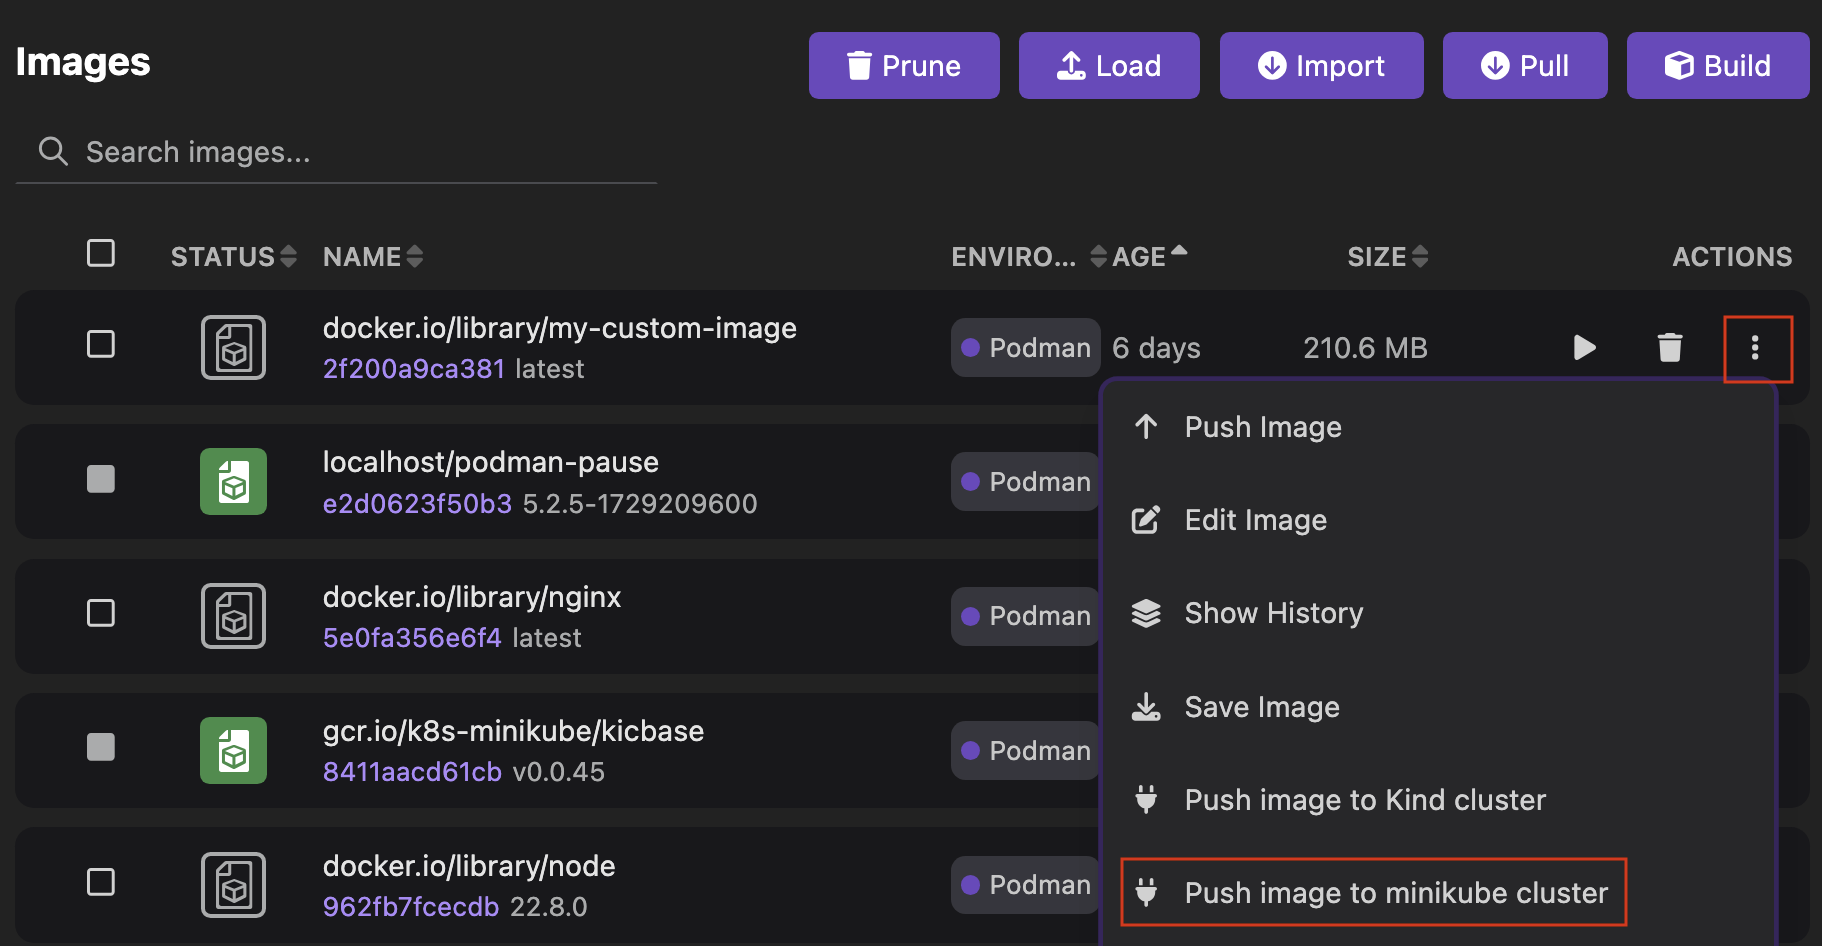
- Click OK.
- Click the overflow menu icon corresponding to
-
Test your image by creating a container:
- Click the Run Image icon corresponding to the image
my-custom-image.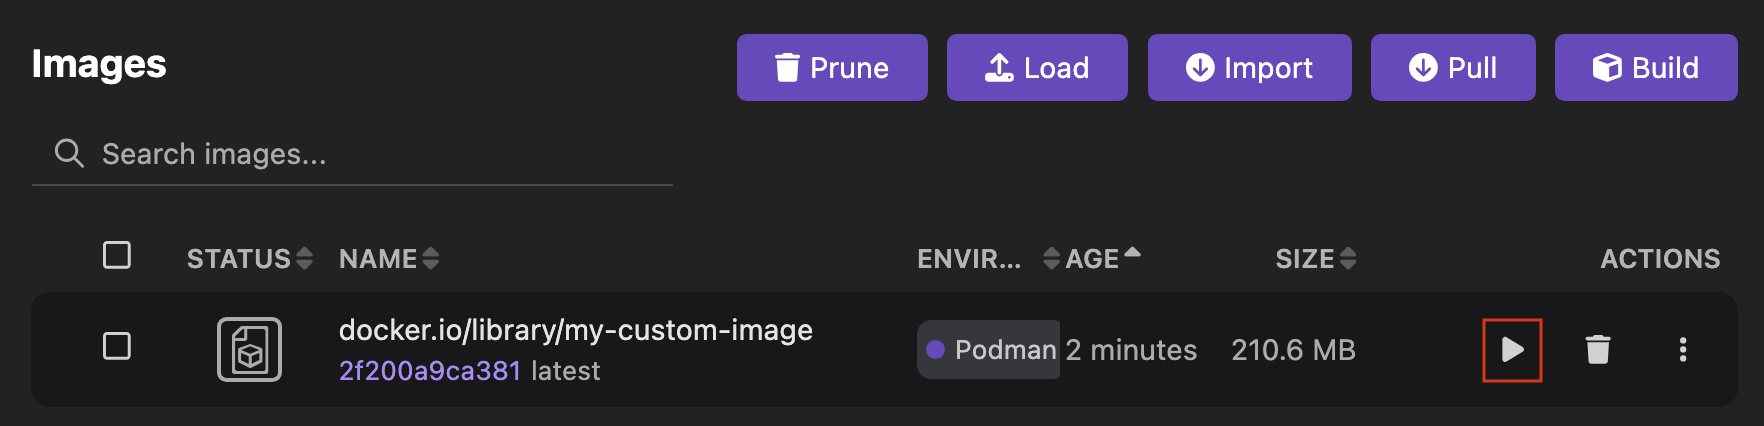
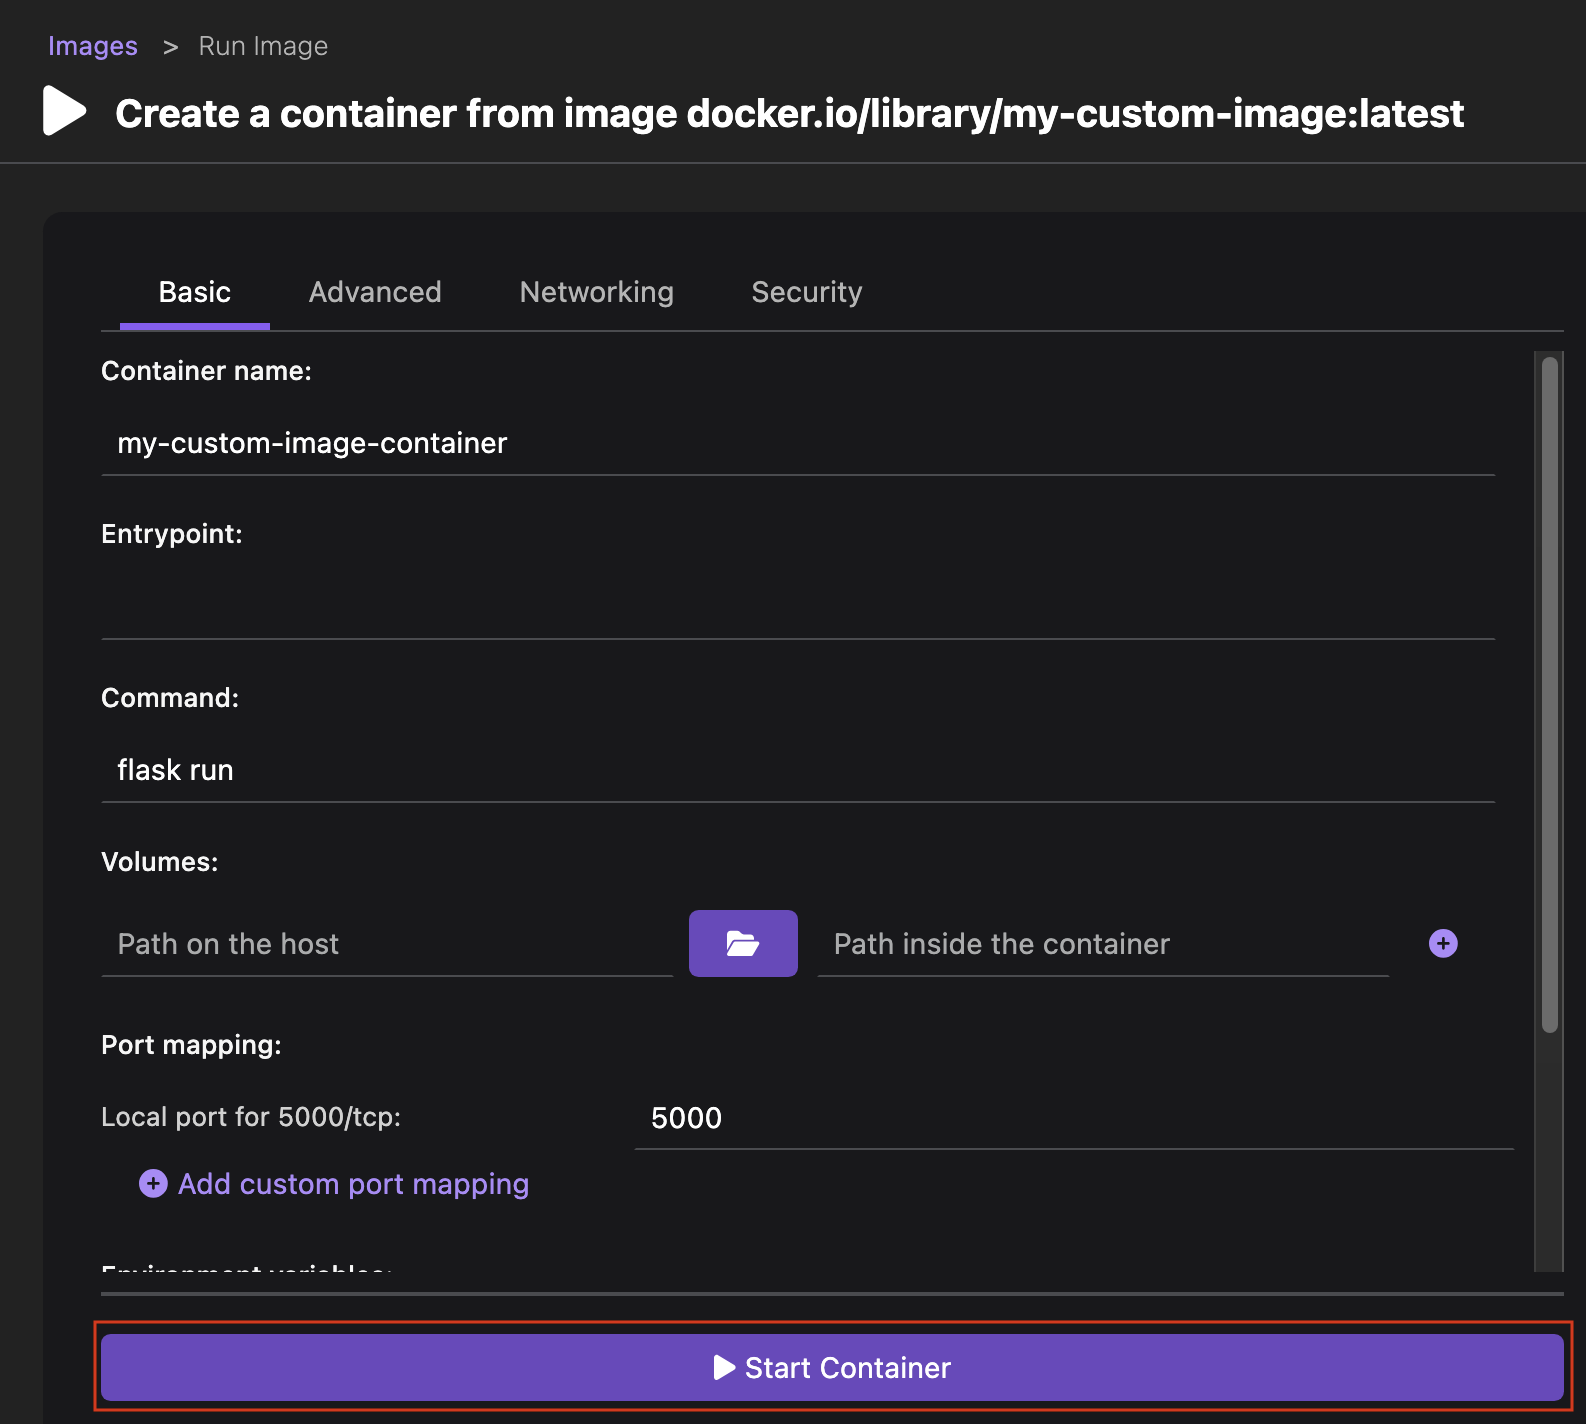
- Container name: enter
my-custom-image-container. - Review the parameters that Podman Desktop has detected from your image definition or edit them, if required.
- Click Start Container.
- Select the Summary tab to view the details of the new container.
- Click the Close icon.
- Click the Run Image icon corresponding to the image
-
Test your image and container on your Minikube cluster:
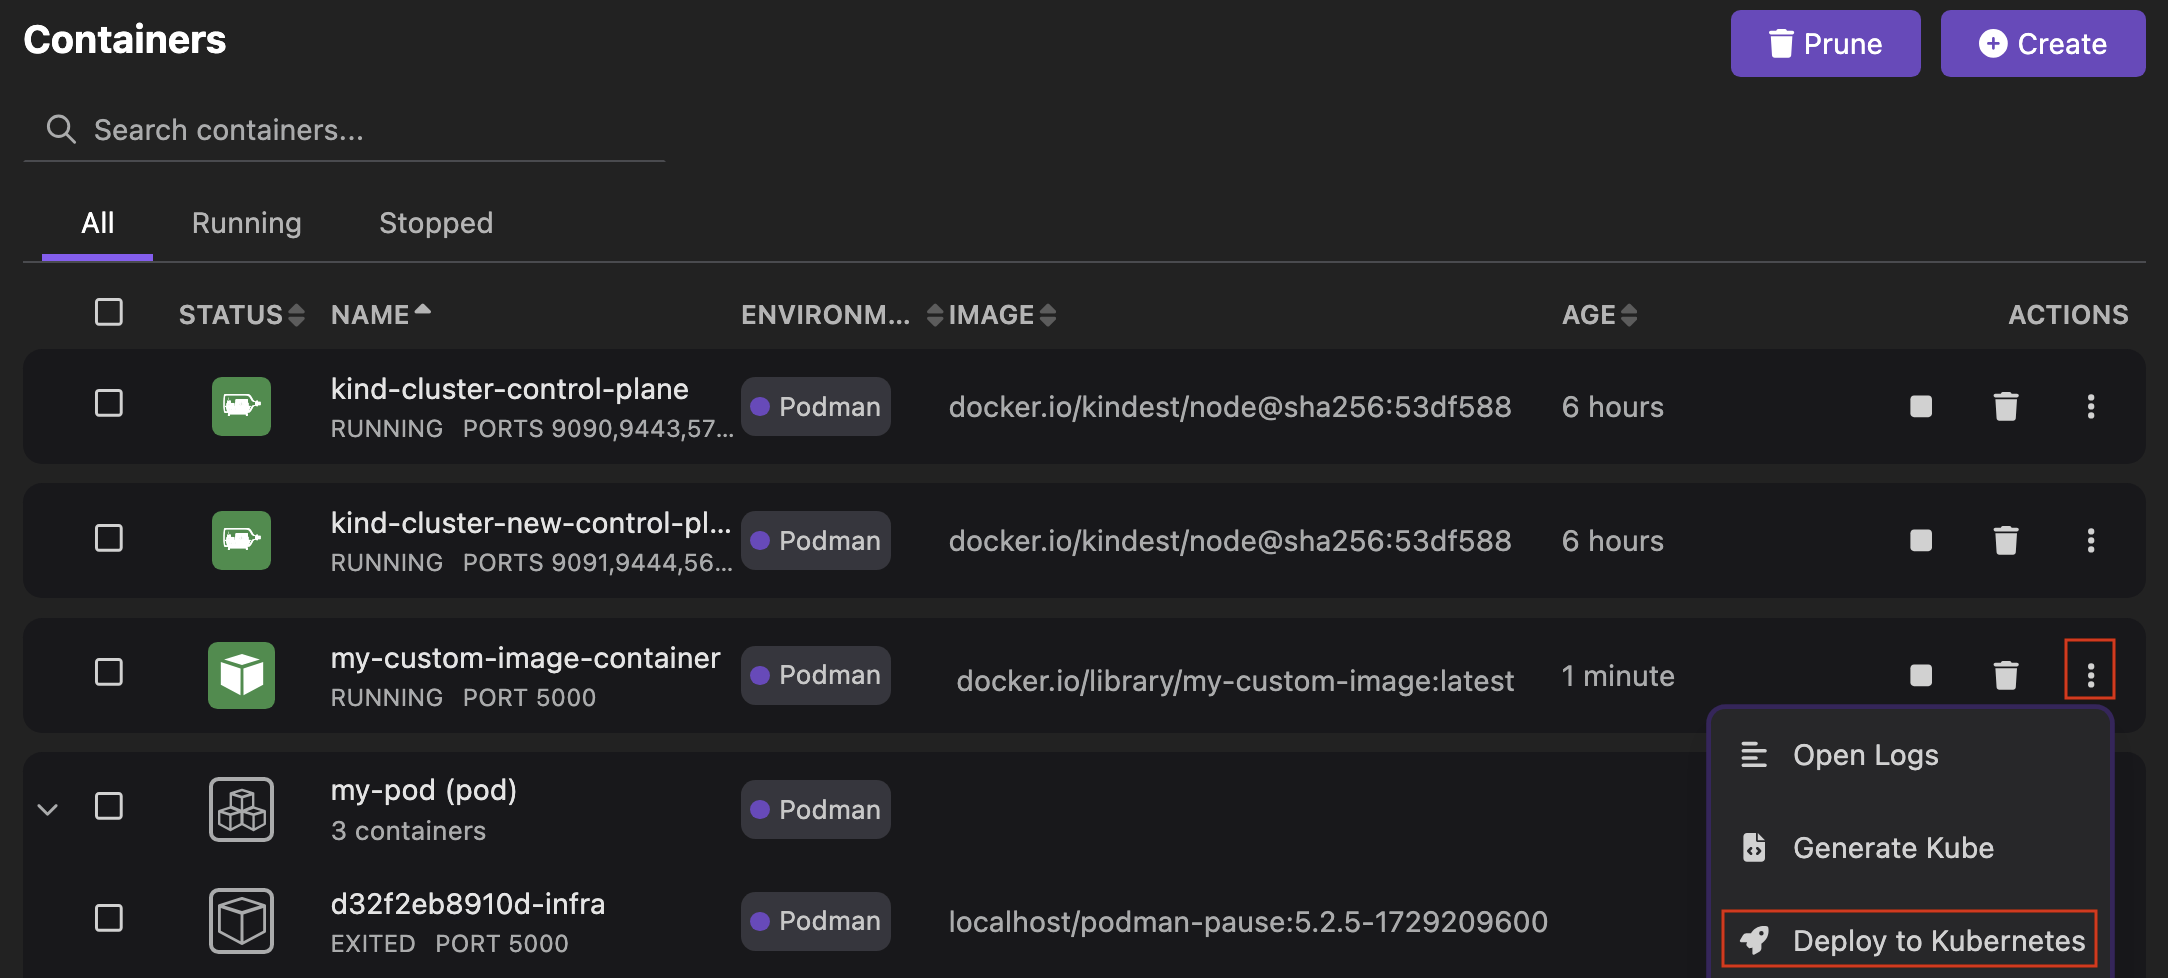
- Click the overflow menu icon corresponding to the container and select Deploy to Kubernetes.
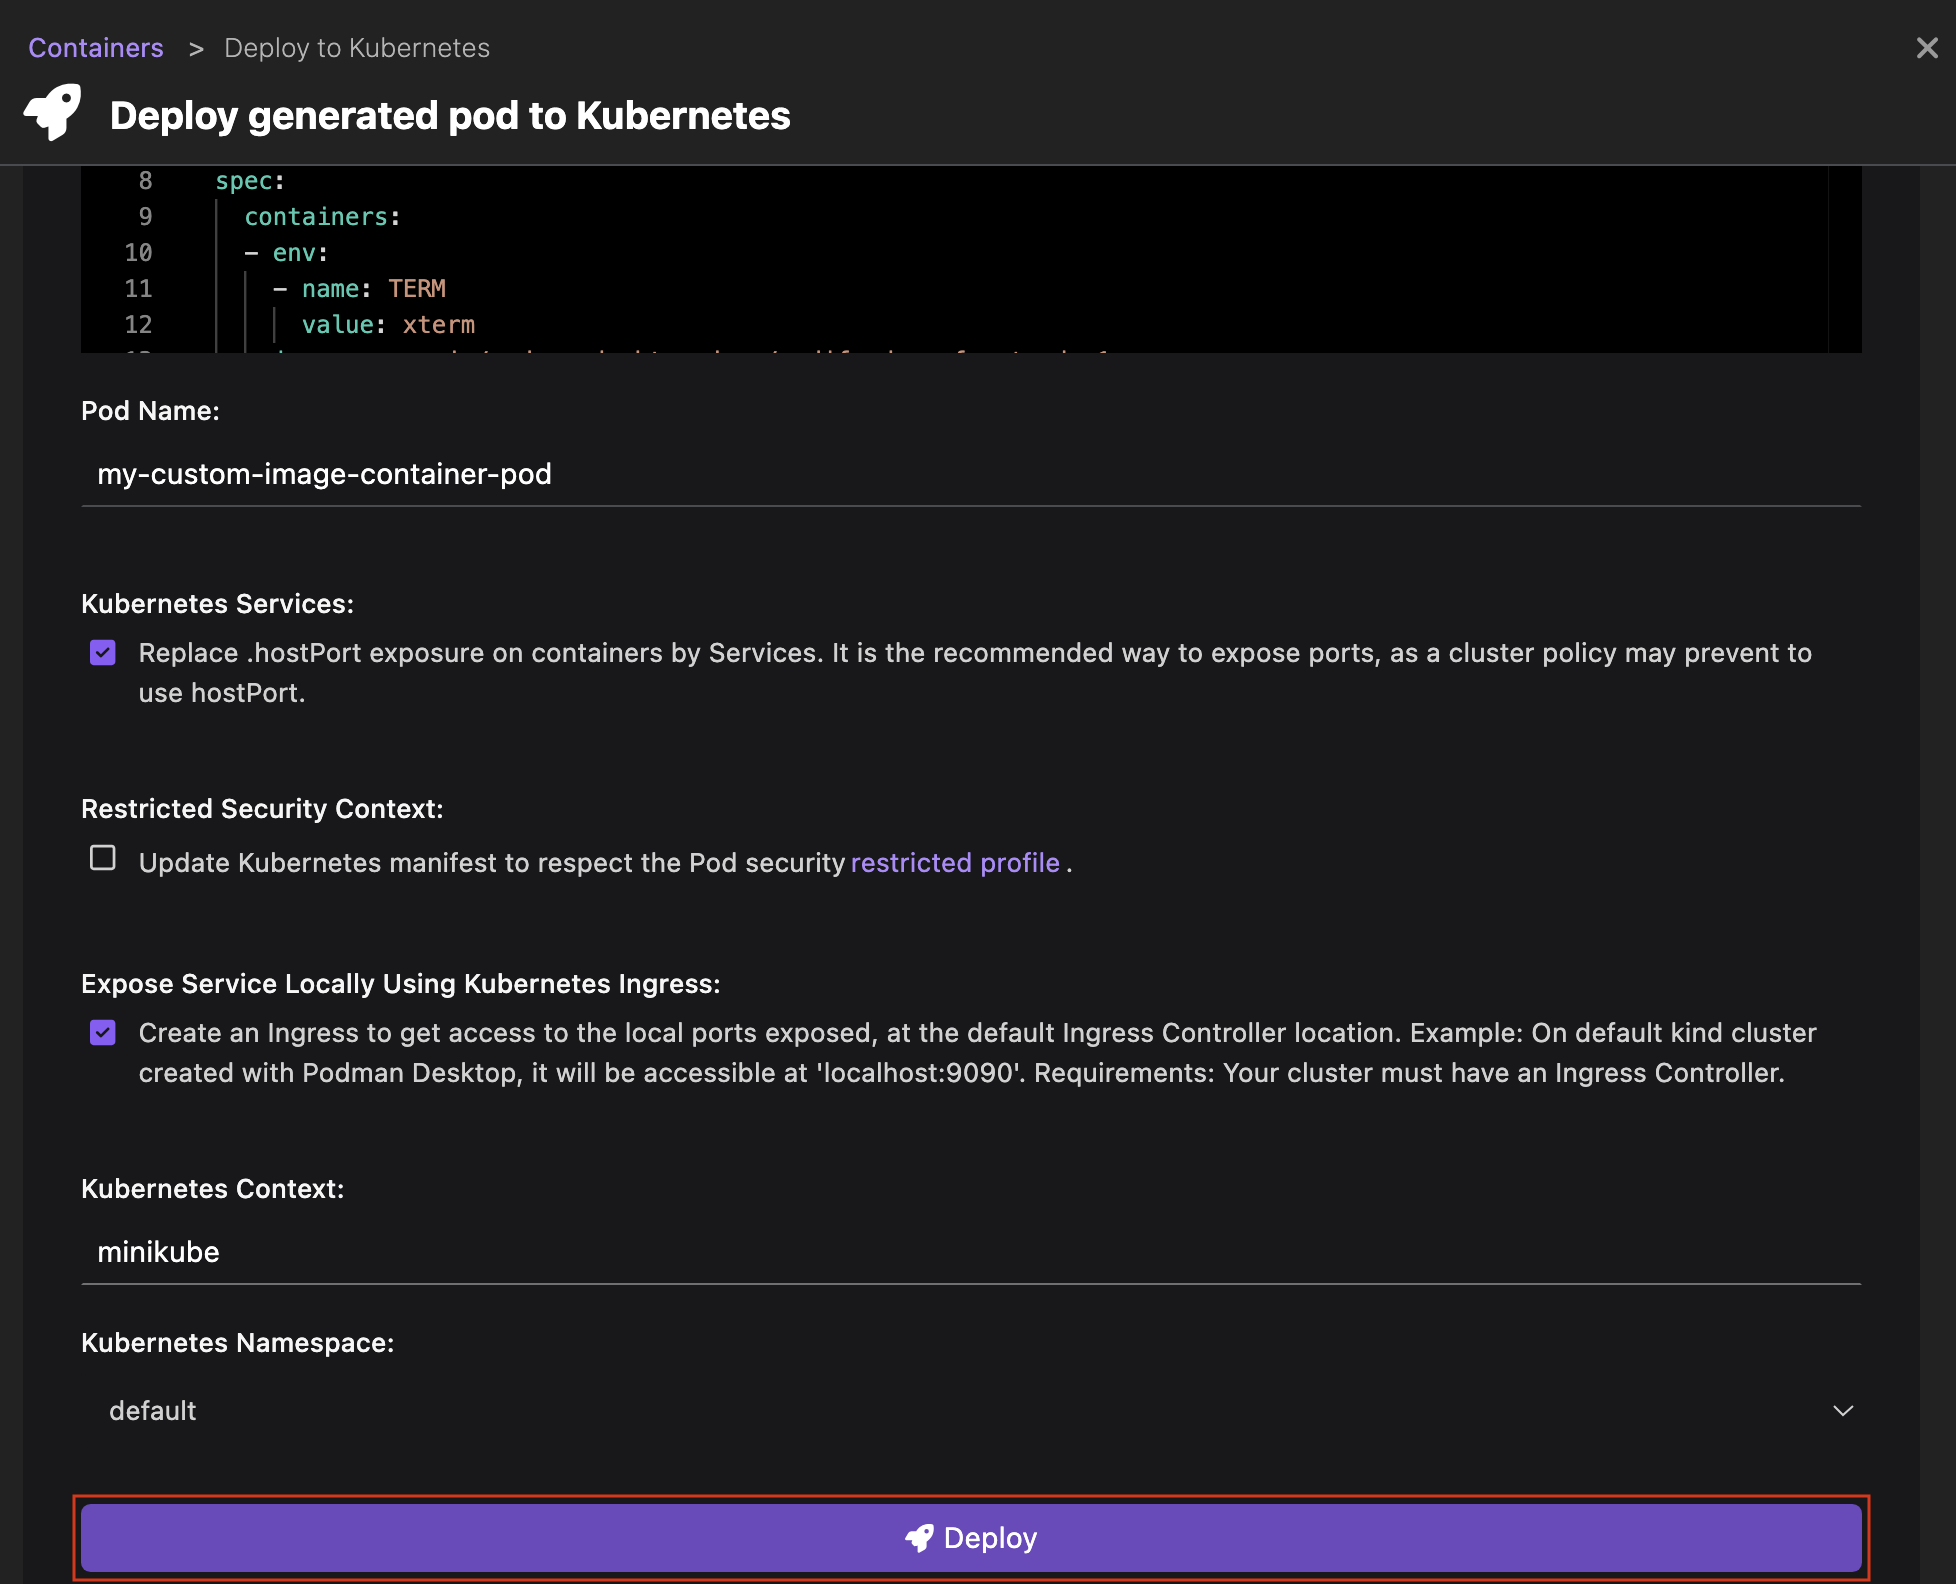
- Provide the following details:
- Pod Name: Keep the proposed value
my-custom-image-container-pod. - Expose service locally using Kubernetes Ingress: Select the checkbox to expose the service locally using the ingress controller.
- Optional: If your container exposes more than one port, select the port to expose from the dropdown list.
- Pod Name: Keep the proposed value
- Click Deploy. Wait for the pod to reach the state: Phase: Running.
- Click Done.
- Click the overflow menu icon corresponding to the container and select Deploy to Kubernetes.
Verification
- Go to Kubernetes > Pods from the left navigation pane.
- View the running
my-custom-image-container-podpod.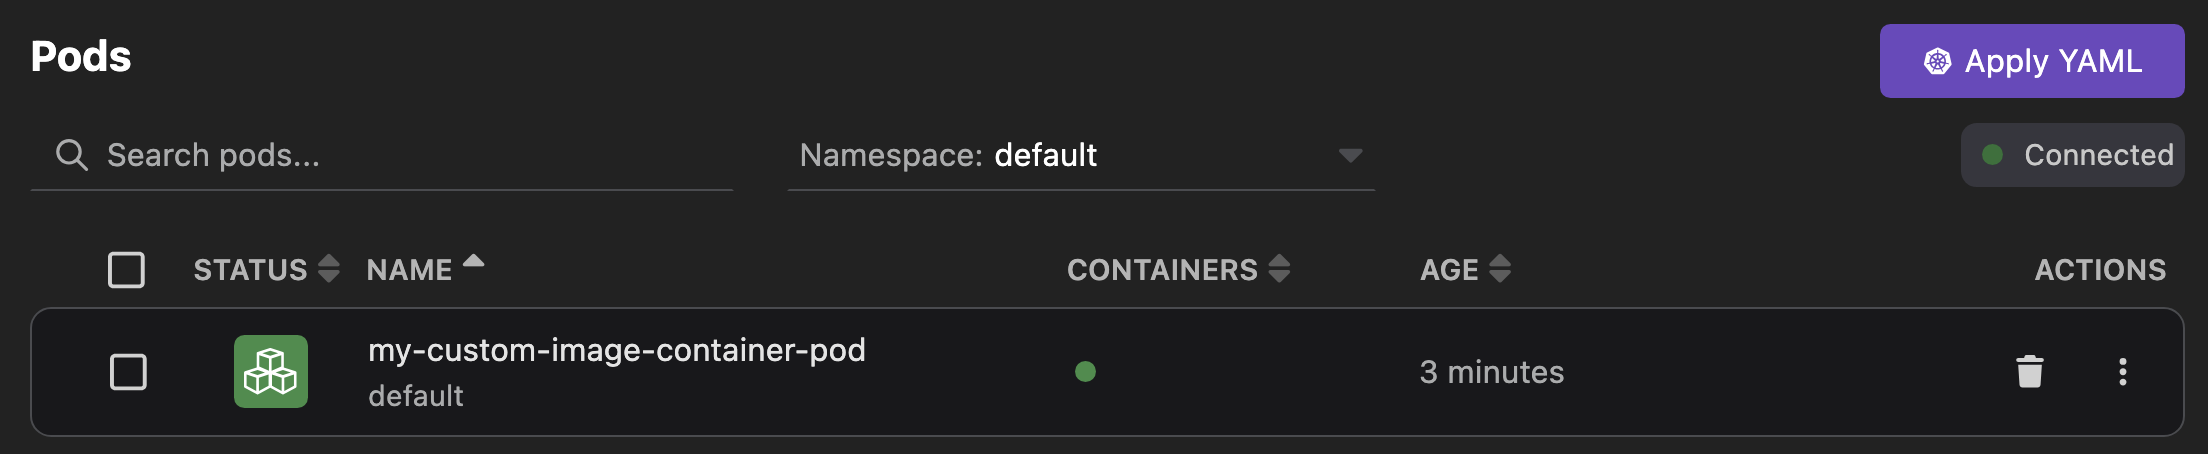
- Click the pod name to view its details and logs.
- Optional: If your container exposes a port, go to
http://localhost:<port-number-exposed>: your application is running.